Fried chicken burger – The burger series
The fried chicken burger is one of those staples of burger making that you need to learn and understand to simplify your life.

The fried chicken burger is one of those staples of burger making that you need to learn and understand to simplify your life.
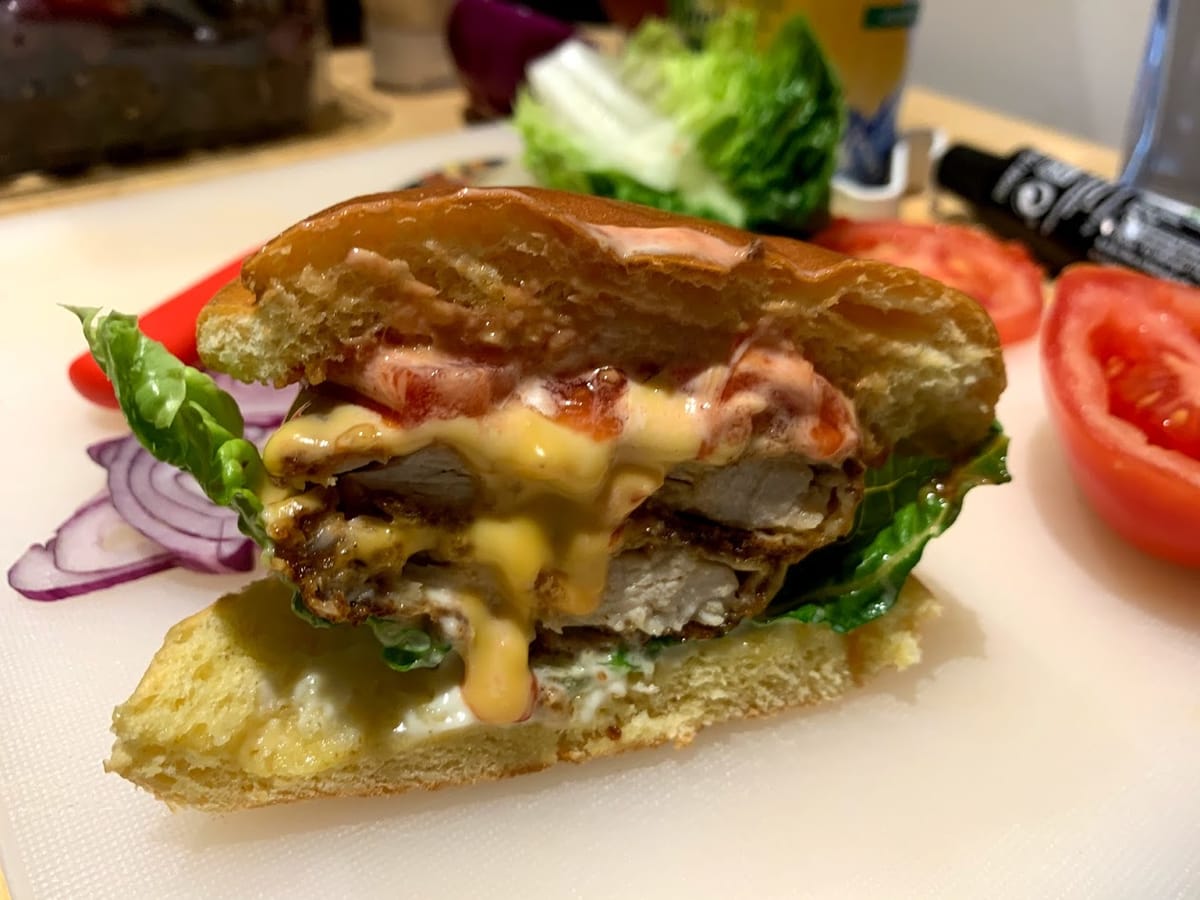
I have found that during my cooking journies, my burger-making has always been fairly classic. By that I mean that a burger for me is a toasted bun, with ketchup and mayo, with lettuce, the meat, cheese, tomatoes, onions, pickles and that is it. Following the same approach, I have been experimenting with changing the meat.
During this process I have tried:
- A pan-fried chicken burger meat: which turned out to be the best as it retains a whole lot of composure
- A deep-fried chicken burger: I mean it’s good and all, but to be honest, you just need too much oil, and it will eventually be too oily which in turn would the whole thing to be oily as well. To be noted though – I am not an expert in deep frying
- A simply grilled chicken breast: which unless grilled in charcoal is dry and fairly liquid-less in a burger. I would not recommend
- A skinless and boneless chicken leg, pan-seared – which is outstandingly delicious but very tedious to get right and cook properly as it’s not the same thickness all around
- Air frying it: Have not tested and don’t know for sure.
Ingredients:
- Chicken or turkey breast
- 1 egg, beaten
- A bit of flour
- Breadcrumbs – panko if you have it
- Salt, pepper
- you favorite burger accouterments – but think about honey mustard as that is very much needed when it comes to chicken
Fried chicken burger recipe
- Out of chicken or turkey breast, cut it in thin fillets. Marinate it with salt and pepper. Use a meat mallet on a plastic wrap to flatten it up. This is cooked faster and requires less oil.
- In a hot pan add some cooking oil. We are looking for almost floating fillets.
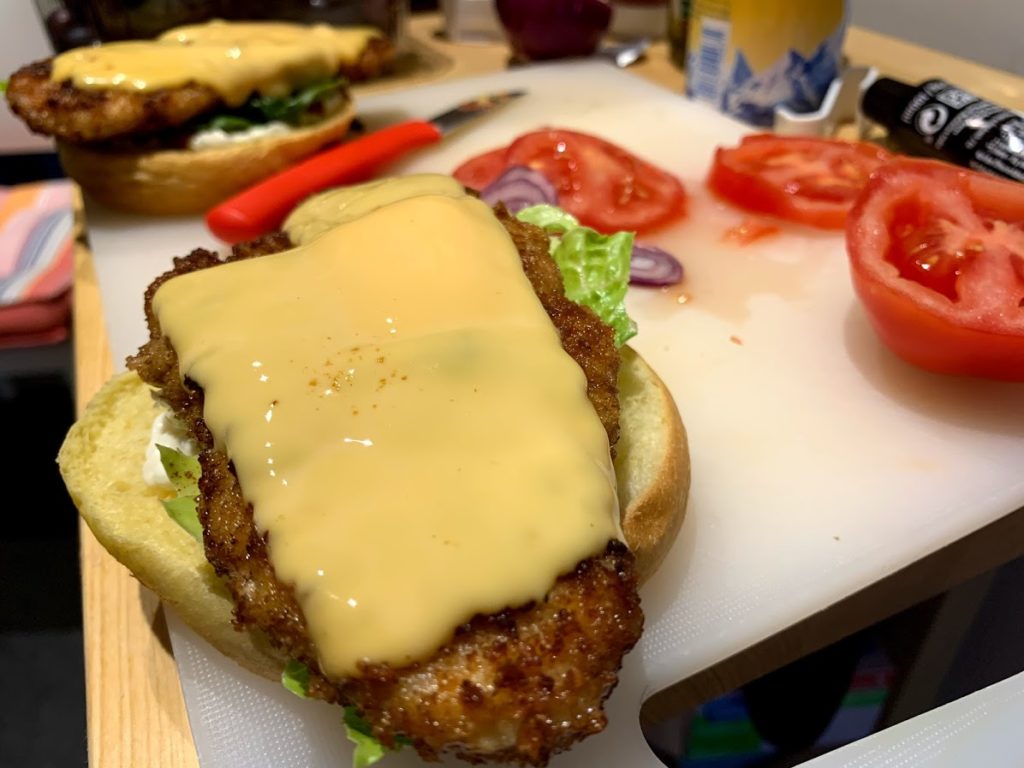
- Dip the fillet in flour (which you should have marinated with salt and pepper) and cover them all around. Make sure to remove the excess flour and then dip it in the egg mixture. Afterward, finalize in the breadcrumbs. Cover it all around and again shake the excess.
- Slowly put the fillets, away from you in the pan. The thin ones would cook for 3 minutes each side, covered.
- Melting cheese on top of the fillets requires 1 minute with a covered pan on a medium heat – so if you have more chicken fillets than pan space, you have to plan a bit ahead. Sometimes I just get all the chickens done, and then step by step melt the cheese. The better option would be the actually melt the cheese once the chicken is almost done.
- Add your favorite accouterments. I added a bit of mayo and ketchup on the bottom toasted bun;
- That’s it. Eat it on the spot.
Check out my burger series for more.