Home Blog Page 4

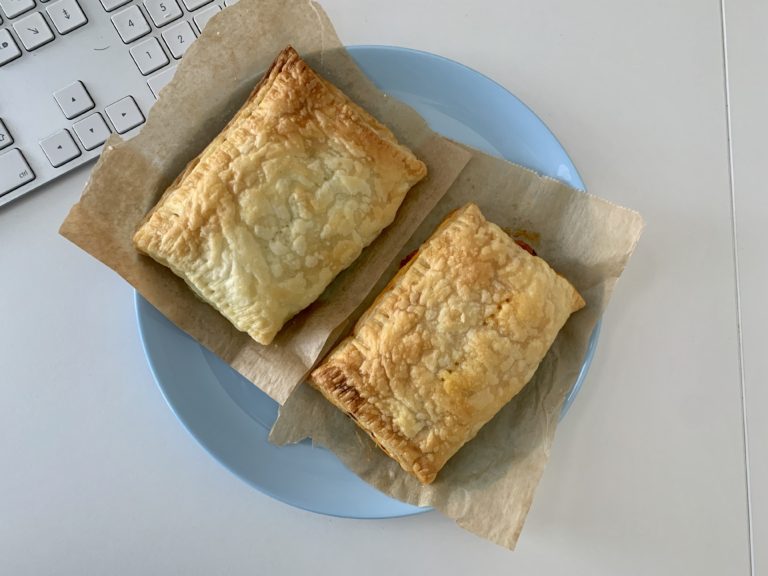
Pie Recipes: savory tomato pie

The savory tomato pie simplified by using store-bought puff pastry and homemade budget can tomatoes and onions.

Whilst this is not my mom’s recipe, it is an oversimplification that has a similar taste profile. I have switched for puff pastry because using normal pastry gets complicated (or I am completely useless when it comes to using it). Also, the puff pastry has the tendency to be a bit fancier and gives more of a wow effect.

Ingredients

  1. Half of a chopped tomato can
  2. One garlic clove, chopped
  3. Half of an onion
  4. Olive oil, salt, and pepper
  5. One puff pastry from the supermarket

The savory tomato pie recipe

  1. In a hot pan on medium heat add the olive oil and the onion.
  2. Marinate it and cook them till they become translucent. While they are halfway, add the garlic.
  3. Once the onions are translucent, add the chopped tomatoes.
  4. Bring to boil and lower the heat.
  5. Reduce and cook it down for 20-30 minutes. We are looking for a fairly liquid-less consistency because they will just spend 15-20 min in the oven
  6. Cut the pastry – mine took 4 rectangles.
  7. Heat the oven at 180 degrees
  8. Add a tablespoon or so of the tomato mixture to the pastry on one half and use the other half to cover. Use the fork to stick together the parts.
  9. Do the same thing for every single one of the 3 other rectangles.
  10. Place them in the oven tray
  11. The best thing would be to give them a quick egg wash on top – but you know – I did not have any leftover eggs at that time, so this is without.
  12. Bake it for 15-20 min or till the puff pastry is cooked properly.

Take it out of the oven and let it chill for a bit. Also, check out my youtube channel for more and this amazing salmon pasta for another easy dinner idea.

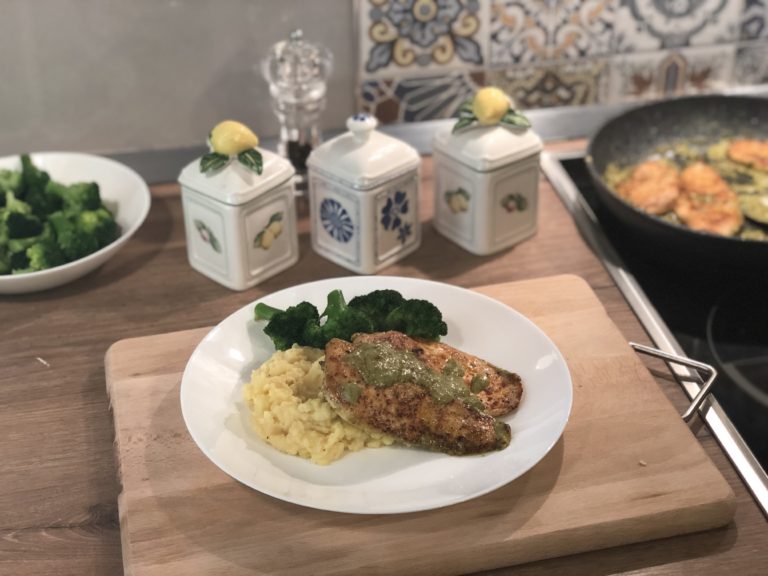
Chicken pesto with mashed potatoes & broccoli

Our chicken pesto is not about using pesto as the primary ingredient but as that additional special addition to make this fairly healthy dish amazing. This chicken pesto is not only about the chicken but also related to the sides – where some easy mashed potatoes and some steamed broccoli.

tl;dr: pan sear the chicken, bake the potatoes and steam the broccoli. In the same chicken pan, add a tablespoon of pesto sauce, a bit of milk, and boil.

Ingredients for two:

  1. One chicken or turkey breast
  2. A tablespoon of pesto sauce
  3. 250gr of potatoes
  4. 1 broccoli head
  5. Salt, pepper and olive oil
  6. A bit of milk and a bit of butter to finish

The chicken pesto recipe

For the potatoes:
  1. Boil the potatoes in salted water till they are easily poked with a fork
  2. Remove them from the water and peel them. I like my potatoes silky that’s why I peel them, but that is not necessarily important.
  3. Mash the potatoes and add a bit of milk and butter.
  4. Add salt and pepper to it to taste.
For the broccoli:
  1. In a pot with boiling water, add the chopped broccoli head
  2. cook them for 5 minutes
  3. It is imperative to cook them in boiling water so that they retain their colour.
For the chicken:
  1. Butterfly the chicken breasts and cut it in the middle. It’s easier to handle and easier to cook. Marinate it and put it between plastic wrap so you can tenderize it with something like a meat tenderizer. We are looking for an even fillet so it cooks easily.
  2. In a hot pan add oil and add the chicken. Depending on the thickness of the chicken it should take around 3-4 minutes each side. My general recommendation is that when you flip the chicken, you should lower the heat to medium and cover the pan. It will make of a moister chicken.
  3. Remove them from the pan and lower the heat even more – to low preferably. At this point add the pesto and the milk and bring to boil.
  4. Remove from heat and add the butter and mix.
  5. Depending on the type of person that you are, you can either soak the chicken in the sauce OR throw it on top
For the plate:
  1. Put a bed of mashed potatoes.
  2. Add the chicken on top
  3. Add a couple of broccoli steams
  4. Top everything off with the sauce

See? Easy right?

Check out my youtube channel for more and this amazing salmon pasta for another easy dinner idea.
Chocolate chip cookies – recipes & alternatives

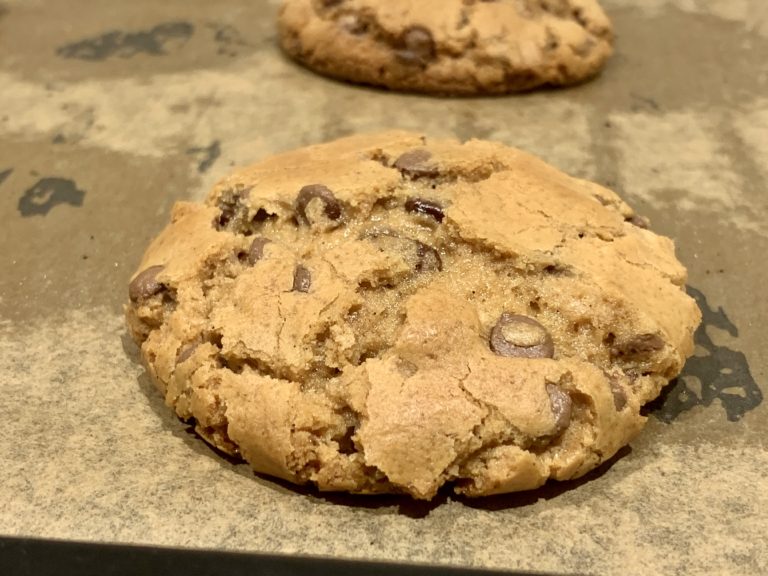
Chocolate chip cookies are the staple of the cookies world and getting them done is surprisingly easy – as they are very forgiving – but getting them right is a very specific an exact science.

tl;dr: combine sugar, egg, flour vanilla and add a bit of starch and baking soda. Let rest and cook in 180 degrees for 12-14 minutes.

Research

As there are a whole lot of recipes and great ideas out there, let me debunk some of the key issues that you need to know beforehand. To help me understand, I have volunteered to try different batches – yeah – I am living the tough life…

Here are my takes:

  • You can do it with one type of sugar, but the cane sugar adds that really distinctive chocolate chip cookie flavor and aroma that you know and adore. I would not recommend going without it
  • I have tried brown butter, cold butter, soft room temperature butter has, and no matter how much I try, room temperature butter has always has given the best results.
  • You can experiment with flour and that actually alters mainly the color of the end result. Type 00 for me has provided the best and most original cookie but surprisingly the desert oriented flours are a bit more fluffy.
  • Cooking time and temperature depends a lot on the type of oven that you have, but do not exceed 180 degrees and do not go more than 14 minutes. Placements of the baking sheet also need to be adjusted. My small oven heats more from the bottom so I place the baking sheet a bit higher than the middle.
  • The simple baking chocolate chips are enough – don’t spend money on fancy crazy chocolate – simple chocolate chips are perfect.
  • We all know that the cookie dough has to sit in the fridge for a while, but what makes the best result? I tried the same batch, in different siting times and for me, the best was the 72-hour batch.
    • The 2-hour batch will cook faster and would be too “flat”
    • The 24-hour batch was just perfect
    • The 72-hour batch had everything that I wanted from a cookie – crispy outside, soft inside an amazing taster profile
    • The 1 week old tasted delicious but it was a bit dryer.
    • I have not tried the frozen batch – everyone says that they are properly stored but my recommendation would be to watch the cooking time and temperature.

I know, too much effort on a cookie – but the chocolate chip cookies deserve that!

Ingredients for the best chocolate chip cookie recipe

  • 120 gr butter that has been left outside for over 30 min so it’s soft
  • 1/2 cup of cane sugar
  • 1/2 cup of normal sugar 
  • 1 egg
  • 1 teaspoon of vanilla extract  
  • 185 gm type 00 flour 
  • 1 tablespoon of starch
  • 1/2 teaspoon baking soda
  • 1/2 teaspoon of salt
  • 250 gr of chocolate chips

The chocolate chip cookies best recipe

  1. In a bowl add the butter, cubed, and mix thoroughly with both the sugars. The butter and the sugar must be properly mixed before the next step
  2. Add the egg and the vanilla extract and mix again.
  3. In another bowl add the flour, the salt, and the starch
  4. Sift the dry ingredients on top of the buttery mixture and combine everything together. At this point, you will see well-known cookie dough consistency which you would be inclined to eat, but remember it has raw eggs in it. If you are like me, you can completely disregard this problem and have a spoonful.
  5. Add the chocolate chip cookies now and mix together
  6. Now just put the bowl in the fridge for like 20-30 minutes because it will make your life easier to divide into small balls.
  7. After 20 minutes, it’s time to divide into small balls.
  8. Put them in the fridge for an hour or two or ideally, overnight and bake them for 12-14 minutes at 180 degrees
  9. Let them sit for 1 hour before eating so it settles.
  10. Ready!

Check out my youtube channel for more and this amazing salmon pasta for another easy dinner idea.
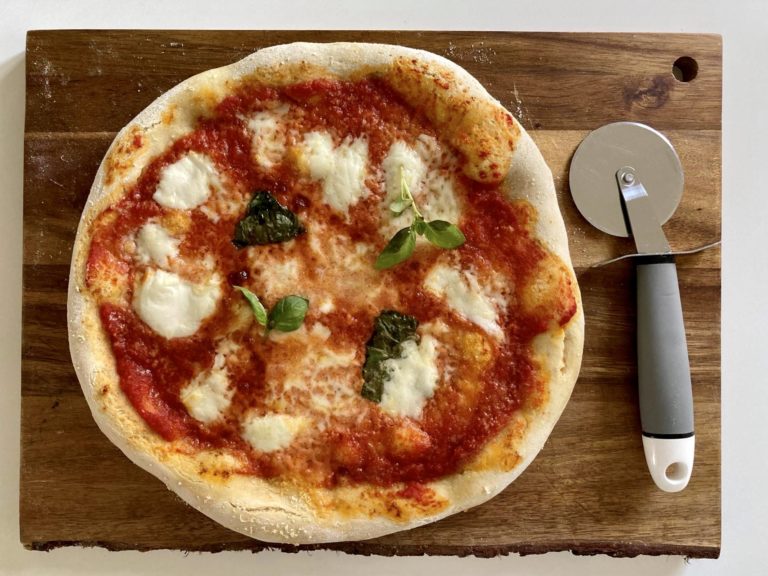
The most basic homemade margarita pizza

The margarita pizza is the pinnacle of pizzas. It is literally better than the sum of its parts. Here is how you approach it if you are a beginner.

tl;dr: get the dough ready, heat up the oven, add the marinara, add the mozzarella, and bake it. finish it with fresh basil and a bit of olive oil

Problems of baking your own pizza and how to solve them

  1. The heat of the oven is one of the most important components. In a real wood-fired oven, the temperatures reach up to 500 degrees Celcius. No normal home appliance type of oven can reach that.
    1. Your first alternative is a pizza stone. You will need to put the stone in the oven and let it heat up for like 30-45 minutes (or whatever the stone says). This is a great heat conductor for the pizza, so whenever you put your dough in the oven it will cook faster
    2. Your second alternative is a pizza iron which is apparently better at conducting heat – don’t know, have never tried it.
    3. The third alternative would be just nothing. Nothing works as well. It will not be as perfect, but it will still be delicious
  2. The fresh mozzarella is very liquidy. If you want a dryer pizza, then take the fresh mozzarella out of the container, wrap them in a few paper towels and place them in a fridge for about 1 hour.
  3. The marinara sauce is one of those things that can make a difference. Check my homemade marinara sauce recipe. Don’t make pizza with store-bought sauce.

Ingredients

  1. Pizza Dough
  2. homemade marinara sauce
  3. fresh mozzarella
  4. a few basil leaves
  5. olive oil, salt and pepper

Margarita pizza recipe

  1. Heat up the oven on your maximum setting.
  2. If you have a pizza stone, add it in the oven now. You will need to wait for it to actually warm up properly.
  3. Start working the dough and open it with the tips of your finger in circular motions. Now if you don’t feel comfortable doing this, no worries, there is no wrong way of doing it – you will get used to it. The core of it all is to just open it and maintain the same thickness all around. It will cook more evenly
  4. Before you do anything, you will need a shovel-like tool to drop the pizza. If you do not have that, then place the dough in some parchment paper. You will lose a bit of heat, but what can you do, eh.
  5. Spread some marinara
  6. Add the mozzarella and speed it around
  7. Add a bit of salt
  8. If you have the shovel-like tool which would act as a makeshift peel, then peel the pizza through and directly in the oven. If not, just place the parchment paper pizza directly in the oven.
  9. Bake for 10-15 minutes, or till the dough is cooked and the cheese is melted.
  10. Remove, add some olive oil and cut it in pieces.
  11. That’s it.

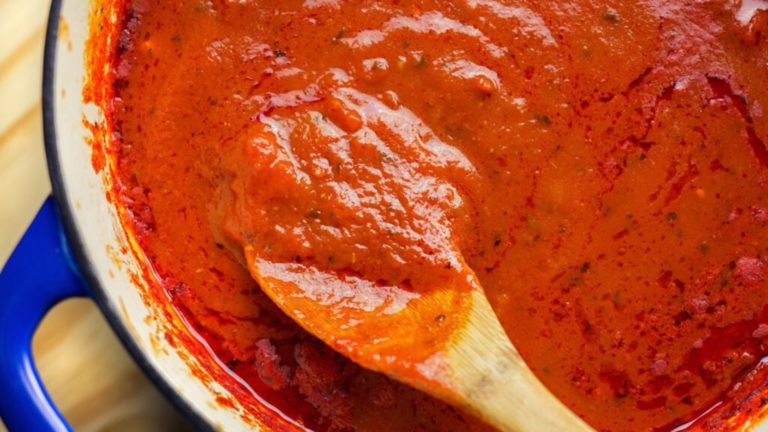
No drama homemade marinara sauce

Homemade marinara sauce is one of those no-fuss recipes that can be done a thousand different ways but we will just focus on the bare minimum.

tl;dr: chopped tomatoes, olive oil, garlic, salt, pepper and reduce.

One of my key comments for a marinara sauce is very basic and simple: Look for chopped/crushed tomato cans that do not have any added ingredients. Adding ingredients creates a different taste profile and it will not be what you are looking for.

Ingredients:

  1. A can of chopped/crushed tomatoes
  2. One or two garlic cloves
  3. Olive oil
  4. Salt and pepper
  5. two leaves of fresh basil

Homemade marinara sauce recipe

  1. Chop the garlic cloves in 3 pieces. We want to remove them later. If you do not mind them, then hope them in small pieces and you will also be fine
  2. In a deep hot pan add some olive oil and the garlic. We are looking to infuse the olive oil with the garlic flavor. Move them around a bit so they do not burn. Burned garlic is not something cool.
  3. If you are the type that wants a spicy marinara – which I humbly think that you should not! – then in the oil add either some fresh jalapenos or red pepper flakes – again, don’t mess with the marinara!
  4. After the garlic is infused, add the chopped/crushed tomatoes. Fill the same can with some water – usually halfway/three quarters way full
  5. Bring to boil and lower the heat.
  6. Add two leaves of fresh basil.
  7. You will need to reduce this for at least 1 hour, preferably two. depending on how much sauce you use. For the normal cans, just 1 hour is fine.

The same source works perfectly for pasta recipes, which you do not need to reduce this much.

Read all about this series on our Pizza Corner or check my youtube channel for more.

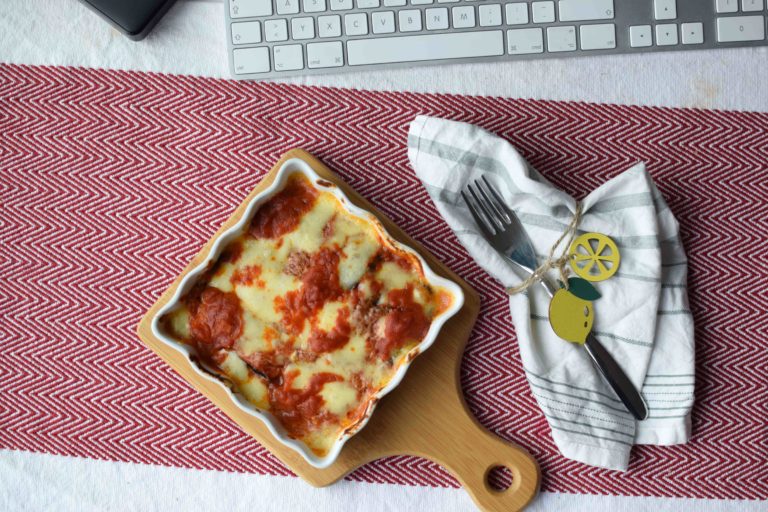
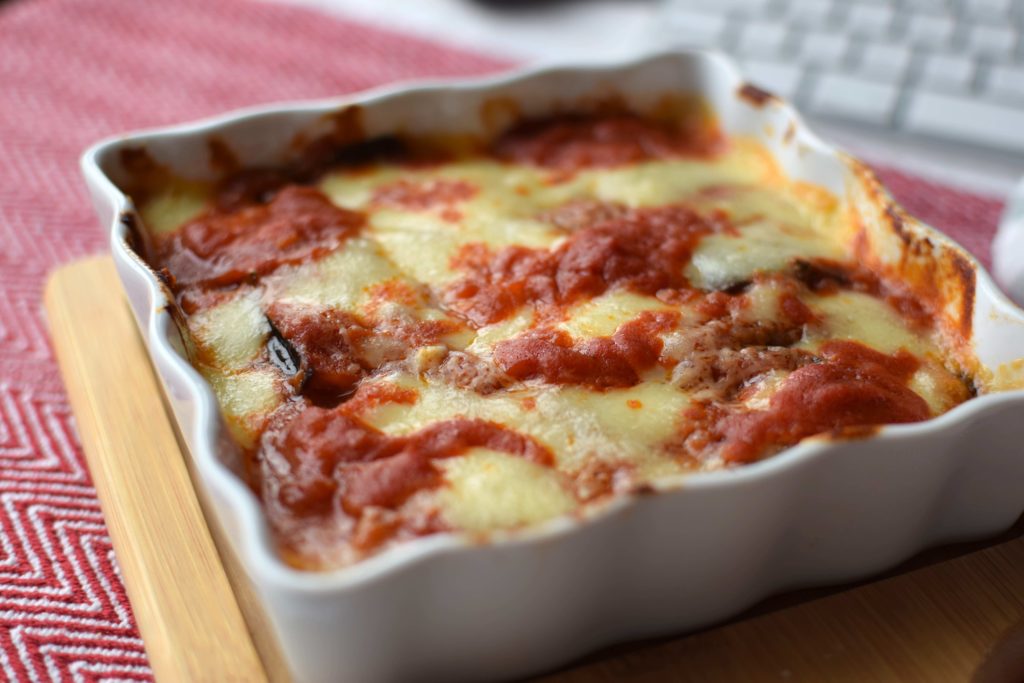
Eggplant parmesan casserole aka the “parmigiana di melanzane”

The eggplant parmesan casserole is one of those misunderstood dishes that you expect to be an abomination with a whole lot of parmesan, but it’s not!

tl;dr: saute the eggplant slices as you see fit, and layer in a casserole with marinara sauce, mozzarella, and parmesan shavings. Bake it for 20 min or till the cheese has melted properly.

This casserole features parmesan as an addition between the layers, as it is an ingredient with a whole lot of flavor which we need to be gentle. We will use it as a flavor provider rather than actual ingredients. Also, parmesan is stupidly expensive and this is supposed to be a very simple and cheap dish.

Eggplant parmesan casserole

One big comment though: aim for small casseroles rather than huge containers!

Ingredients:

  1. 1 eggplant, sliced
  2. 1 fresh mozzarella which is around 120 grams
  3. a bit of grated parmesan
  4. 1 can of chopped tomatoes
  5. 1 garlic
  6. a bit of basil
  7. olive oil, salt, and pepper
  8. A bit of flour

Eggplant parmesan casserole recipe

  1. In a pan add olive oil and the chopped garlic. Let is simmer for a bit and then add the can of chopped tomatoes + a bit of water (half to the chopped tomatoes can), bring to boil, lower the heat and let it simmer for 30 min to 1 hour depending on how thick you prefer the sauce to be. Add salt and pepper to taste.
  2. Slice the eggplant and salt it. Let is be for about 10 minutes as we want to extract the bitterness and the excess water. After the 10 minutes, dry them with a paper towel and they are ready to be cooked
  3. Cook the eggplant your preferred way. However, you want to make them is perfectly fine.
    1. If you want a low-calorie approach, then just grill them.
    2. The alternative would be to flour them and fry in high heat. This is the meet us in the middle type of way. Do not forget to salt and pepper the flour as it will make a major inpact
    3. Some others do a full egg/flour/breadcrumb baste, but I tend to think that it makes the whole casserole a bit too heavy
  4. Preheat the oven to 180 degrees.
  5. In a casserole layer in this order: sauce, eggplant, a sprinkle of parmesan, fresh sliced mozzarella. Fill the casserole up however you want but the last layer should be a sprinkle of parmesan
  6. Bake for 20 minutes
  7. Ready

Check out my youtube channel for more and this amazing salmon pasta for another easy dinner idea.
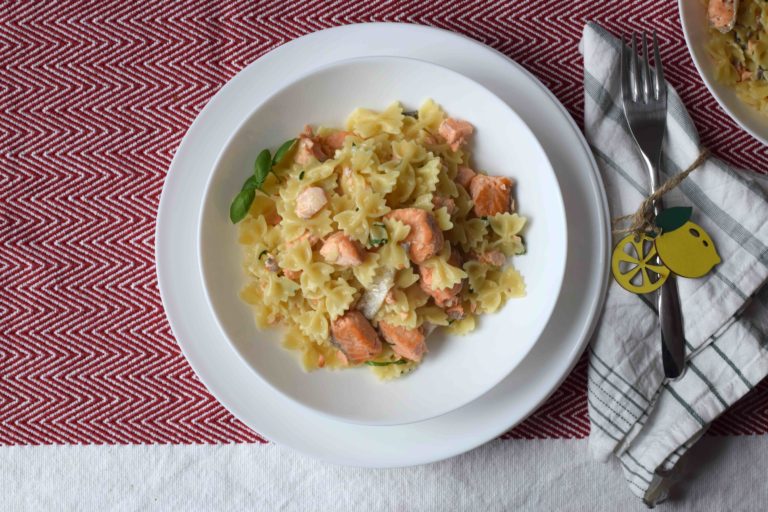
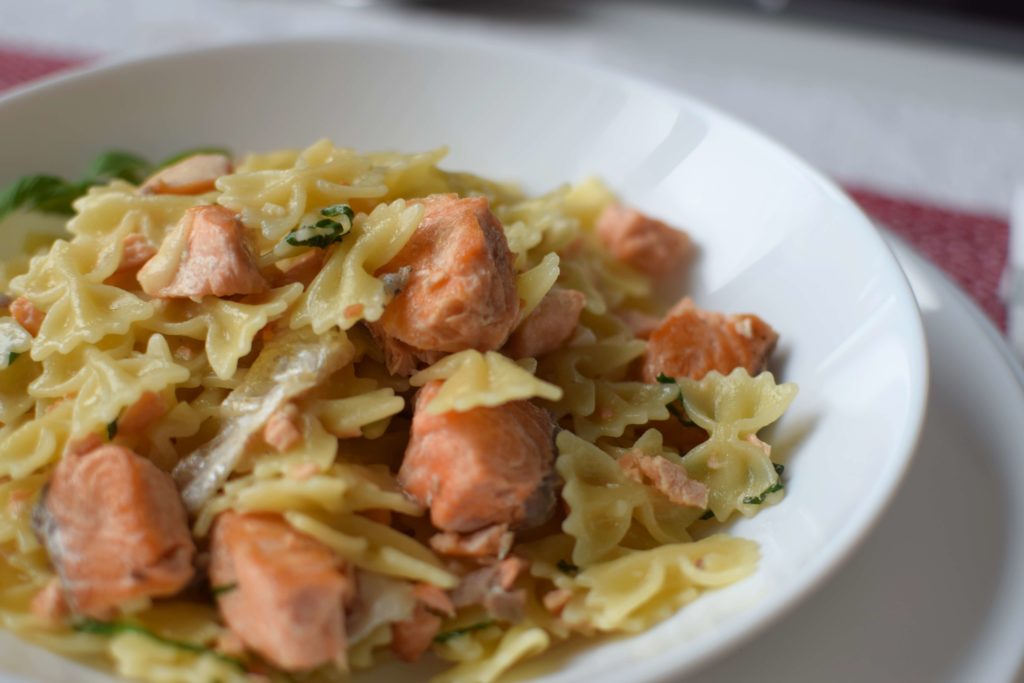
Salmon pasta recipe cooking basics

There are plenty of salmon pasta recipes out there, but today we will focus on the basics. After you master the basics you can make it however you want and add whatever you want to it.

salmon pasta

First and foremost you should treat salmon in two main dimensions.

  1. The first: as a protein to your dish – in other words, a great addition to make the pasta more interesting and complete.
  2. The second: as the main flavor giver. Salmon generally has a very dominant flavor and taste. Treating it just as one of the additional ingredients is a bit short-sighted. As such it should be treated as the main ingredient and the rest as secondaries.

Second, we will try to make this pasta with just the basic ingredients, and all the other additions you can work with what you have. The core here is pasta, salmon, garlic, wine, and a bit of milk. You can switch the milk for water or heavy cream. I prefer milk usually as it’s much easier to work with.

Ingredients:

  1. Your choice of short pasta for two. I had farfalle.
  2. A simple salmon fillet cut in pieces lengthwise.
  3. 150ml of white wine
  4. Milk
  5. two garlic cloves chopped
  6. Olive oil, salt, and pepper

The salmon pasta recipe:

  1. Start with the salmon fillet, would highly recommend to scrape/remove the scales, cut lengthwise, and dry with paper towels.
  2. Marinate it with salt and pepper and put it in a hot pan with olive oil.
  3. Sear the salmon in high heat, on both sides. It will seem like the salmon will stick to the pan, but you have to be patient like with any fish. After the Maillard reaction, it will lift off easily. If you do not feel like being patient, accept the fact that the salmon will be in pieces – not the end of the world, but you know…
  4. After you have gotten a good color on the salmon (note, you don’t have to fully cook it), add the garlic and saute it a bit to get that garlicky flavor. At this point, if you are not comfortable working with the salmon as you think that you may burn it, remove it from the pan and add the garlic.
  5. At this point, you should start the pasta As from now on we are about 5-10 min from having everything done
  6. t’s time to deglaze the pan with the wine. and bring it to boil. I would highly recommend adding the salmon now and whatever juices it has released as it would integrate wonderfully with the wine
  7. As the mixture is boiling, and the alcohol has evaporated, add some milk.
  8. One minute before the pasta is done, reserve a cup of pasta water and then drain.
  9. Add about half a cup of pasta water to the mixture and taste. Check for salt and pepper and add some as you should need some.
  10. Throw in the pasta and mix while killing the heat.
  11. The excess liquid will be drained by the hot pasta, the starchy pasta water will thicken the sauce and you will be left out with some amazing simple sauce.

Check these other pasta recipes and obviously our video recipes on youtube.

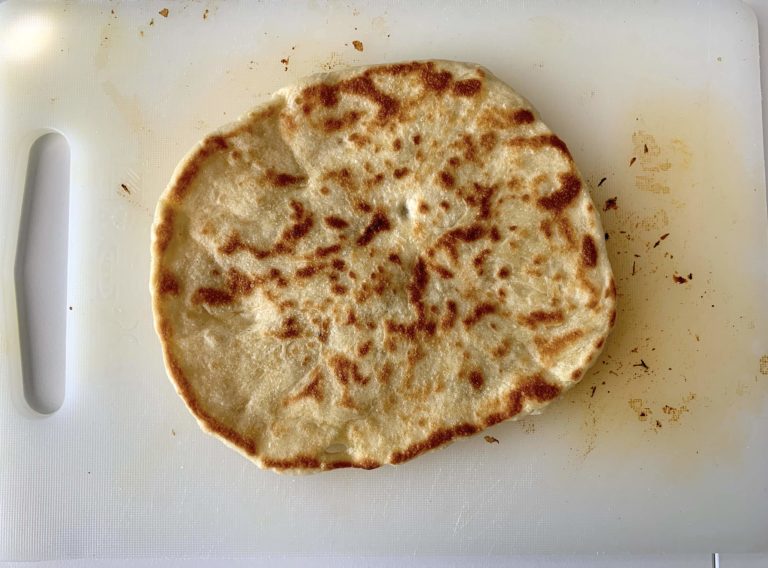
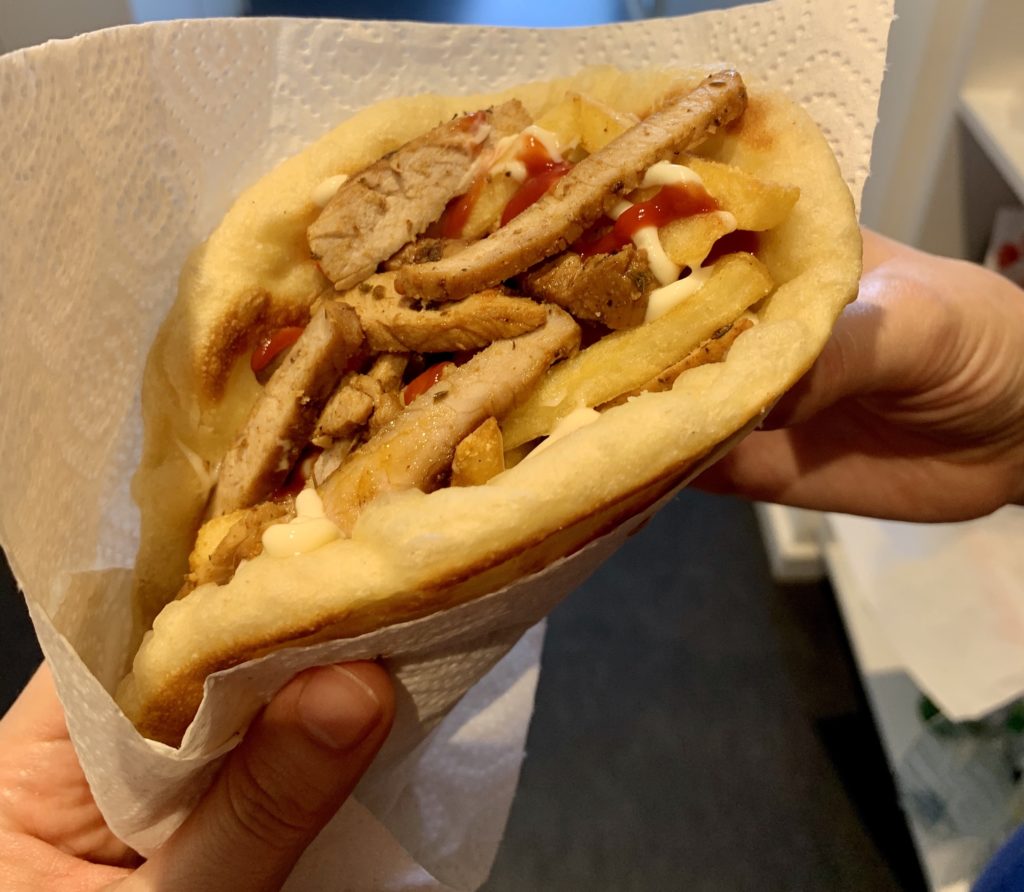
Homemade pita bread for your gyros

The homemade pita bread is one of those bread types that are cooked in a hot pan and require no actual baking and go wonderfully on a platter or for gyros.

tl;dr: combine the water and yeast and let rest. Add the wet ingredients together, and then combine the mixture to the dry ingredients and work the dough. Divide into small balls and spread the dough, fry each side for 1 minute with just a bit of olive oil.

This is a complimentary recipe to extend your chicken gyros if you are feeling that you need to experience the next level, soft and delicious pita bread.

homemade pita bread gyros

Ingredients

  1. A pinch of sugar
  2. 2 teaspoons of active yeast
  3. 160ml of milk
  4. 80 ml of warm water
  5. 320gr of flour
  6. 0,5 teaspoon of salt
  7. 1 tablespoon of olive oil.

Step by step homemade pita bread recipe

  1. Combine in a small container the water and the yeast. Let it rest for 10 minutes.
  2. Combine the dry ingredients together in a big bowl – the flour, the salt, and the sugar.
  3. Once the yeast has rested, combine the wet ingredients together.
  4. Add the wet ingredients to the dry ingredients and start mixing. First with a spatula and then once the whole thing is starting to incorporate and become a bit sticky, with your hands
  5. Properly flour a working surface so that the dough does not stick and work it. We worked it for 10-15 minutes – it’s a proper workout 🙂
  6. Once the dough is properly ready, take a deep bowl, and add oil to it. Add some oil to your hands as well, and rub around the dough. Place the dough in the bowl, cover it with a towel, and let it rest for 45 min to 1 hour. It should double in size.
  7. With the dough doubled in size, you will need to oil a bit a working surface and place the dough in it.
  8. Push it down so you let most of the air out, give is a quick stretch, and cut it in even pieces. You should make with this much flour 6-8 pita breads. Now in here, tackle it as you see fit as it is important to adjust to your pan.
  9. Out of the pieces, with your hands, make them in small balls.
  10. Put a pan in medium heat and add just a bit of olive oil.
  11. Roll the balls in thin circles to the size of a pita – in other words, fairly thin.
  12. Add the pitas in the hot pan and cook it 1 minute each side.
  13. While one pita is cooking, you should be rolling the next.

That’s eat – now combine everything and make some great pita bread! Also check this easy lentil soup video recipe.

Superfoods: Easy lentil soup

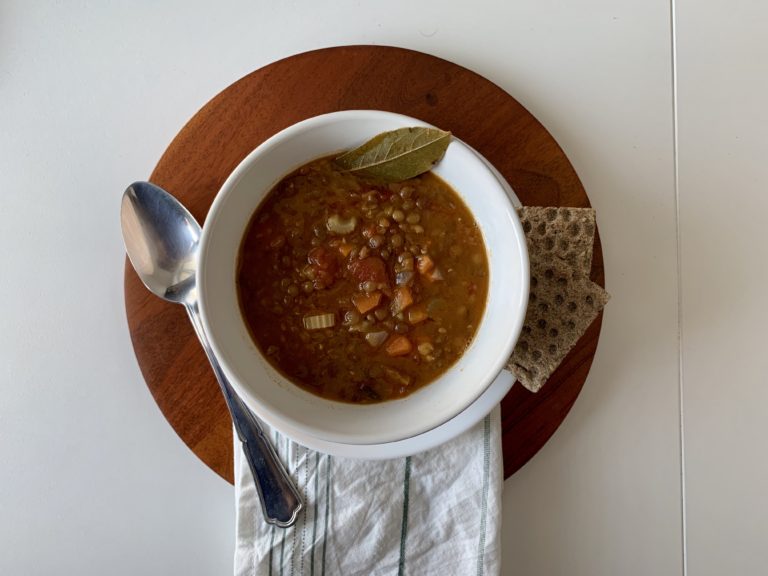
Lentil soup has the tendency to be one of those underdog soups, fairly balanced, extremely easy, so cheap yet falling behind the fancy creamy soups out there.

tl;dr: tackle it like any soups but just soak the lentils in water beforehand.

There are two main lentils which you will be able to find in almost any supermarket. There are a bunch of different other lentil types, that makes for a different type of soup and require a different type of recipe, but here are the most common ones:

  1. The black ones which require soaking in water for at least 1.5-2 hours
  2. The red ones are the easiest to cook and the literally become paste after boiling them for 30 minutes.

Today we will do the black lentils.

Ingredients:

  1. 200gr of black lentils
  2. half of an onion, chopped
  3. 2 carrots, chopped
  4. 1 celery stick, chopped
  5. Half a can of peeled tomatoes
  6. 1 liter of liquid (that being some stock and some water, most stock and the rest water, or just water)
  7. Salt, pepper, and olive oil

Easy lentil soup recipe

  1. Soak the lentils in water for around 2 hours;
  2. After the 2 hours are almost up, put a big pot, on medium-high heat, and add some olive oil;
  3. Add the onions and saute them until they are translucent;
  4. After they are translucent, add the carrots and the celery;
  5. Mix them up so they are coated in oil. Cook them for about 1 minute or so;
  6. Drain the lentils and then add them to the mixture;
  7. Add the tomatoes and work them with a wooden spoon so you break it down a bit;
  8. Give them a quick stir and then add the liquid;
  9. Bring the whole thing to boil and then lower the heat to medium-low;
  10. Cover the pot and let it simmer for around 1 hour.

Call me weird, but I usually like to add a tablespoon of vinegar and that is my favorite ingredient. Also, I think that this should go very well with some Brussel sprouts.

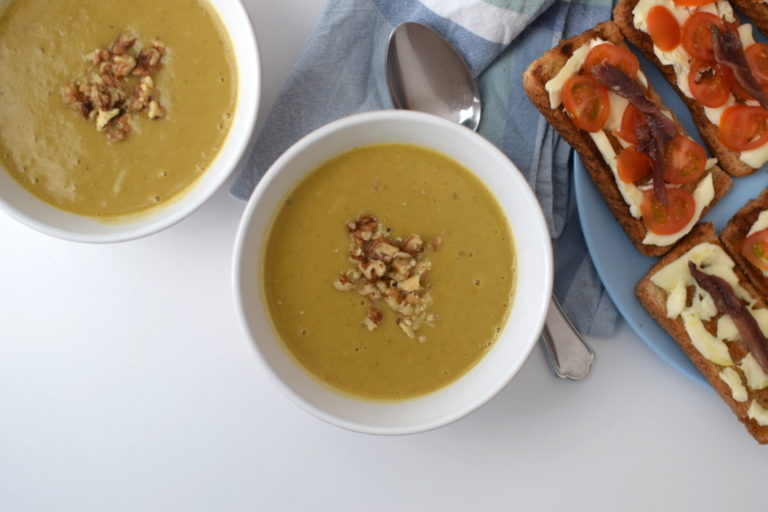
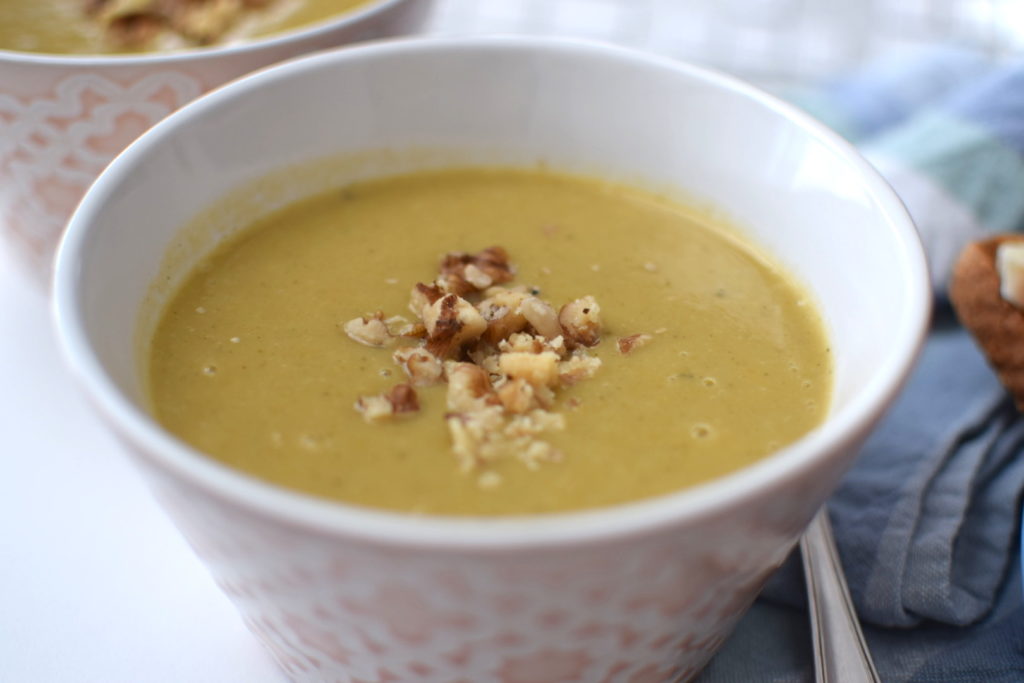
Zingy broccoli carrot celery potato soup

Broccoli carrot celery potato soup is exactly what it seems – a healthy, nutritious soup that will make you happy, warm and help you feel good.

There is no wrong way of doing this btw – approach it as you like BUT (and a very big but hehe) we are just making it a bit more complex and adding it some more of a zing so you can surprise yourself.

broccoli carrot celery potato soup

This is a follow up of How to make a vegetable soup 101 which I would highly recommend checking out before as it explains everything why we are doing this.

Ingredients:

  1. Half of a chopped onion
  2. 1 chopped carrot
  3. 2-3 chopped celery sticks
  4. 1 cubed potato
  5. 1 medium-sized broccoli head
  6. Chicken stock and water
  7. Aromatics
  8. A bit of hot sauce.

Step by step recipe:

  1. In a big pot add some olive oil and cook the onions on medium-high heat until translucent.
  2. Add the chopped carrots and the celery
  3. Mix everything together and cook them for 1 minute till the oil covers everything.
  4. Add the broccoli
  5. Throw in some aromatics like a bay leaf
  6. Add some chicken stock. and add the rest in water. You should aim for about 1 liter of liquid.
  7. You can let it boil in medium heat in a pressure cooker for about 30 minutes or in a normal pot for around 1 hour.
  8. Blend everything together with a hand blender.
  9. Add Tabasco or your favorite lemony hot sauce. This will make everything so much better.
  10. Check for salt – I did not need any as the chicken stock was a little salty for some reason

This broccoli carrot celery potato soup (i know, a mouthful, but I can not really call it soup…) is ready to eat – also some very cool bruschetta does go very well with it, just to be fancy enough.